
In part one of this blog email marketing series, we covered creating email templates. In this blog, you will learn how easy sending emails with ClickDimensions is. Using marketing lists, you can easily send an email to multiple recipients.
In a recent blog, we discussed creating marketing lists. You’ll need to have marketing lists and email templates created prior to sending emails with ClickDimensions.
The third and final blog in our email marketing series focuses on interpreting the email statistics provided by ClickDimensions. It is vital to know how people are interacting with your emails.
As defined by ClickDimensions: “an email send is the record where you set up the information for sending an email through ClickDimensions.”
Anytime you send an email through ClickDimensions, an email send needs to be created.
To Create a New email Send
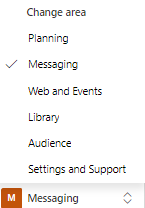
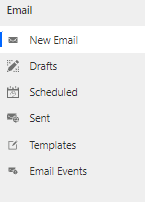
In the messaging area of ClickDimensions, navigate to Email > New Email.
Once the email record is opened, fill in the required information: the editor type, subject, from name. You may also choose to include an email template at this point. When the record is saved, you will then have the ability to choose your recipients, add marketing lists, and give your email a name.
To add your recipients, navigate to the recipients area of the form. There, you can choose to add leads, contacts, or marketing lists. Giving your email a name will make it easier to find your email later.
Then click Save. The email send record will then be found in Email > Drafts.
Required Fields on an email form
- Editor type
- Owner of the email – This will automatically populate to whomever is creating the email.
- Subject of the email – When you add an email template, this will automatically populate.
- Category – This will also automatically populate.
- From email
- From name
- Send immediately – You must specify whether you want to send your email immediately or schedule for later.
Optional Fields on an email form
- Name of email – This is not required, but it will help you later in locating your email.
- Email template
- Preheader – Adding a subject for your email is required, but adding a preheader is optional.
- Campaign – Although this is optional, it is highly recommended to tie your email to a campaign. To learn about creating campaigns, visit our recent blog.
- Test emails
- Recipients – You can choose if you want to send your email to a marketing list, a contact, or a lead.
- Suppressed marketing lists – You may select one or more static or dynamic Marketing Lists to exclude from your Email Send. To learn more suppressed marketing lists, click here.
Once an email template is added, the subject and preheader are automatically populated.
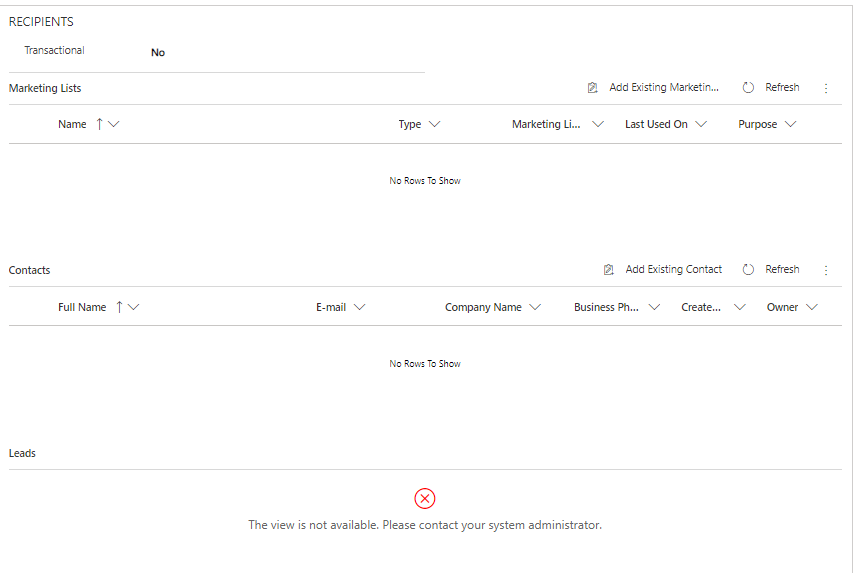
Adding marketing lists, contacts, and leads to an email
Once the required elements of your email have been saved, you can add your marketing lists, contacts, or leads.
If you choose to send an email to a marketing list, the marketing list needs to be set up prior to creating the email.
If sending the email to contacts or leads, existing contacts and leads can only be used.
Text Version
In our last blog, we mentioned the importance of having a text version on email templates (link). It is also important to make sure your email has a text version. Open the text version tab.

If a text version is not already populated, click on the blue A button to generate or update your text version.

Make sure not to forget to save your text version!
Sending an email
Before sending an email, it is a good idea to send a test email. Enter the test email(s) and then select the Test button at the top of the record.

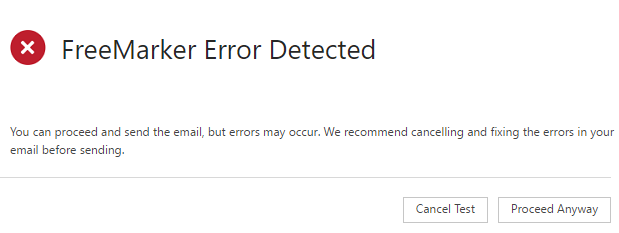
If the Email send contains any freemarker errors, you will see this pop-up…
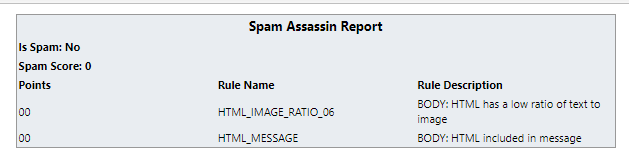
If there are no freemarker errors, your email will open in a browser along with a Spam Assassin Report. This report will provide a spam score, which tells you how likely your email is to end up in a junk folder. Any email that scores a 3 or higher is likely to end up in someone’s junk mail.
Once your email has been proofread and any spam issues or freemarker issues have been resolved, select the Send button from the top of the record.
Sending emails with ClickDimensions is easy!
Now that you have seen just how easy sending emails with ClickDimensions is, you are ready to implement emails into your marketing strategy and start winning more customers. The third and culminating blog in our email marketing series will focus on analyzing the email statistics provided by ClickDimensions.
How can we help?
Dynamics 365 users have two world class options for Marketing automation – ClickDimensions and Dynamics 365 Marketing. The go-to marketing automation solution for us at enCloud9 is ClickDimensions.
ClickDimensions is a full-functioned marketing suite that integrates with Dynamics 365. ClickDimensions leverages standard Dynamics 365 functionality – like marketing lists. In that way, it looks and feel like any other area of Dynamics 365.
Contact the marketing automation experts at enCloud9. We can help you select the right marketing automation solution for Microsoft Dynamics 365.
Marketing automation and CRM working together provide you with clear insights into your customer’s journey. In just 7 days, we can get you started with ClickDimensions. enCloud9 will configure our Marketing Accelerator in your existing Dynamics 365.
Not using Dynamics 365 Sales yet? No worries, we can implement our Sales Accelerator to get you up and running fast.
To learn more about our Accelerators, visit our website.
We also use the ClickDimensions Social Marketing Solution – which is only available as an add on, so we are experts in that as well. Contact us to see if this solution is right for you.