About Goals
Goals can be an important part to any organization. Not only do they provide employees with something tangible, but their progress can also be easily measured – as they are working through to their end goal. In some organizations, goals are used to determine compensation and benefits. In addition, sales and service goals are also a common measure of overall performance of individual staff members, sales teams, regions, and more. This blog discusses just how quick and easy it is to set up Dynamics 365 goals. To learn more about Dynamics 365 Goals, visit our blog about How Dynamics365 Helps Businesses to Stay on Target.
Parts of Dynamics 365 Goals
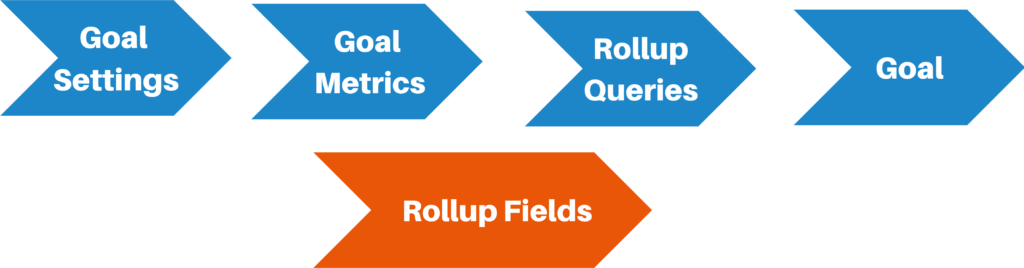
There are three parts to any goal:
- The goal
- The goal metric
- The Rollup field
To configure Dynamics 365 goals, the goal metric needs to first be specified. This defines what you will measure.
This is what the high-level view on how to set up goals in your system looks like:
First Step – Setting Goal Metric
A goal metric is the foundational element of goals in Dynamics 365. Goal metrics are generally not specific to any individual and tend to be less specific than the goals themselves.
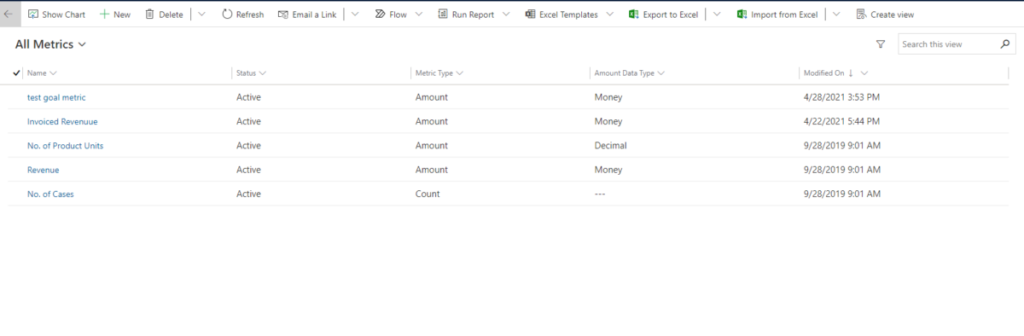
Dynamics 365 has three pre-configured goal metrics (number of cases, number of products, and revenue). You can choose to use one of these pre-configured goal metrics or set up your own. If you choose to set up one of your own, follow these simple steps:
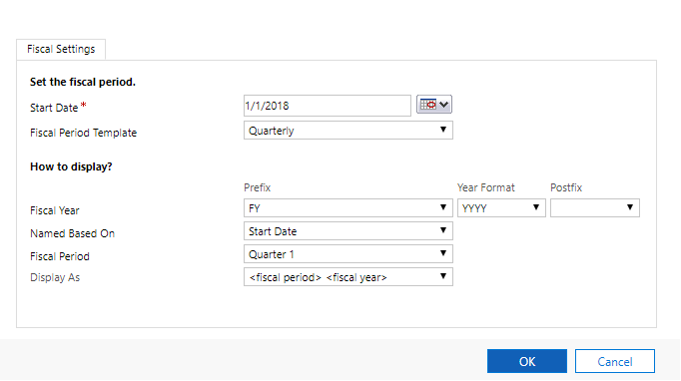
Set up fiscal years
First, the fiscal year need to be configured in your system. By default, Dynamics 365 defines fiscal year based on the calendar year, although not all companies define their fiscal year in that way. However an organization manages their fiscal year, it is important that the fiscal year is configured in the system correctly – as the fiscal period for the goal is based on a company’s fiscal year.
Fiscal periods are important to goal management – as all goals are time bound. A fiscal period is the time period for which the goal will be tracked.
Fiscal year settings can be redefined at any time. To navigate to fiscal year settings, go to
Settings > Business Management > Fiscal Year Settings.
Step one – Setting the goal metric
After configuring the fiscal year in your system, it is time to set your goal metric. You must set your goal metrics before the goal itself. There are two types of goal metrics (amount and count). The amount metric type can be a money value, an integer, or a decimal. The count metric type is an integer.
In order to set a goal metric, you need to have the Manager, CEO- Business Manager. System administrator, or System Customizer security role. Once that is in place, it is time to set your goal metric.
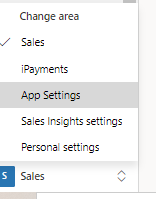
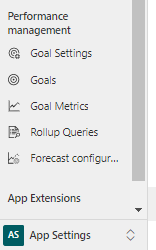
- First – In the site map, in the lower left-hand corner of the screen, navigate to App Settings.
2. Next – select the Goal Metrics.
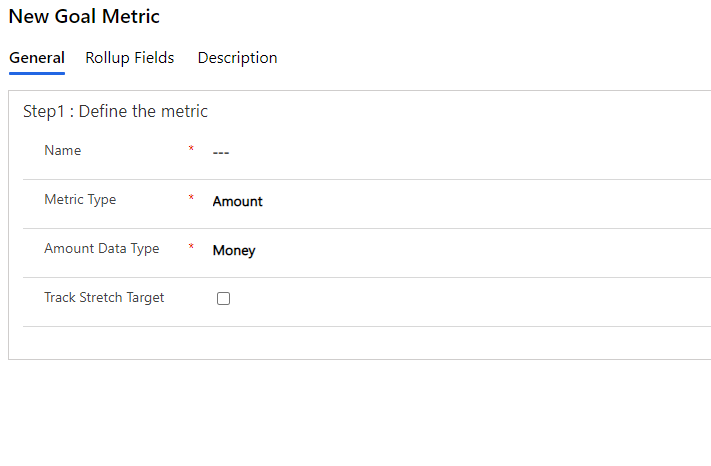
3. Then – in the command bar, select New.
4. Finally -under Step 1: Define the metric, fill in the following information: (name, metric type, amount data type, track stretch target) and then select Save.
Step two – Setting the Rollup Field
- It is now time to define the Rollup fields.
- Navigate to the Rollup Fields tab and select Add New Rollup Field.
- In the New Rollup form, fill in the following information:
- First, choose the rollup field to track against goals
- Next, specify the details about the source data that rolls up
- Lastly, determine the date field that determines the goal period that the records will roll up into
8. Select Save and Close.
9. Next, navigate to the Description tab and enter a description for the goal metric- to enable other users to understand what metrics are being tracked.
10. Then, select Save.
Step three – setting up the Goal
- Again, navigate to App Settings, in the site map icon, but this time – choose Goals.
- On the command bar, select New and fill in the appropriate information (name, parent goal (if applicable), goal metric, and owner)

4. Select Save.
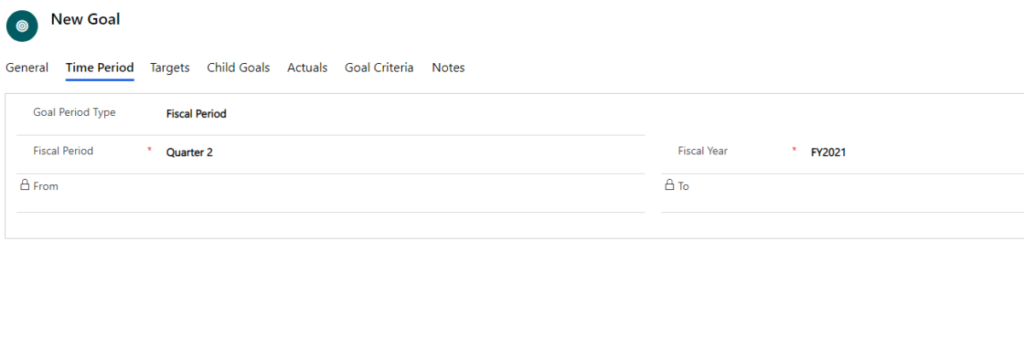
5. On the time period tab, specify whether the goal period is a fiscal period or a custom period.
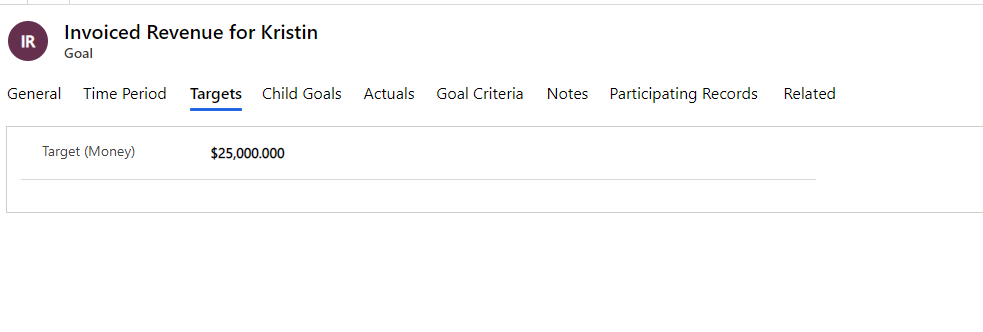
6. Navigate to the Targets tab. Specify a target value against which the results on the goal rollup will be measured.
7. To add an existing goal as a child (if applicable), navigate to the Child Goals tab and fill in the appropriate information.

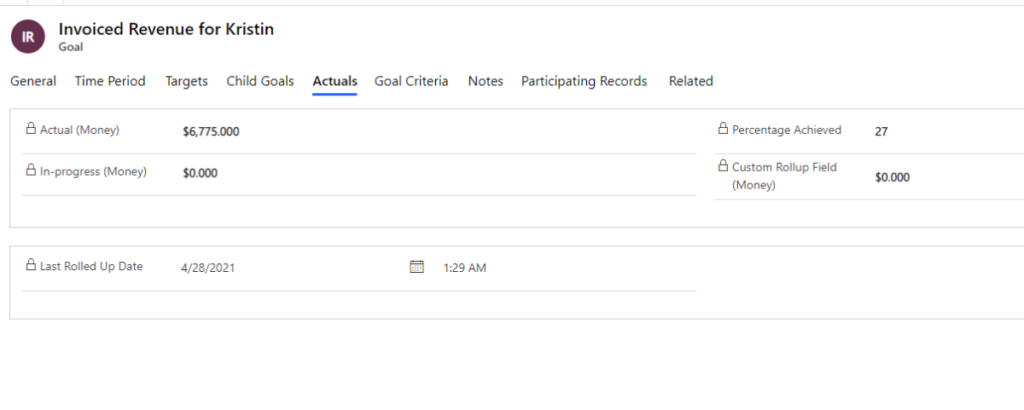
8. The Actuals tab shows the actual value achieved towards this goal – as of the last rolled-up date.
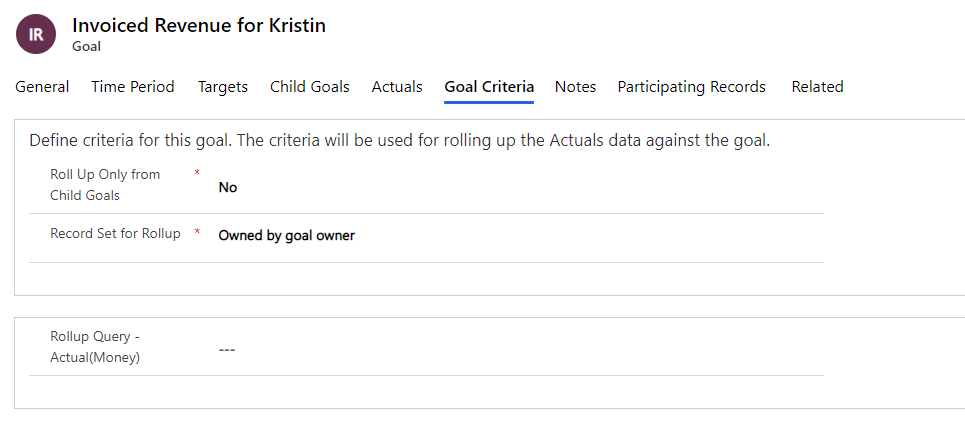
8. Go to the Goal Criteria tab. Define the criteria to be used for rolling up the Actuals data against the goal.
9. On the Notes tab, any notes relevant to this goal may be entered.
10. Select Save and Close when finished.
It is easy to configure Dynamics 365 goals!
So now that you’ve seen the impact that goals can have on your business and how easy it is to configure Dynamics 365 Goals, what is stopping you from getting started?
For a more in depth and hands on experience with goals, visit the Microsoft learning path module on Defining and tracking individual goals in Dynamics 365 Sales and Customer Service. This introductory module includes an overview of goals, as well as more information on parent goals and child goals and an exercise on measuring success using goals.
How can we help?
enCloud9 has years of experience helping companies like yours increase sales, revenue, and productivity. If you are not already using Dynamics 365, we can certainly get you started quickly with one of our Accelerators. Accelerators are prepackaged Dynamics 365 implementations designed to get your business up and running on Dynamics 365 in approximately seven days. To learn more, visit our website or our YouTube page.
For more interesting blogs about Dynamics and the Power Platform, visit our blog.